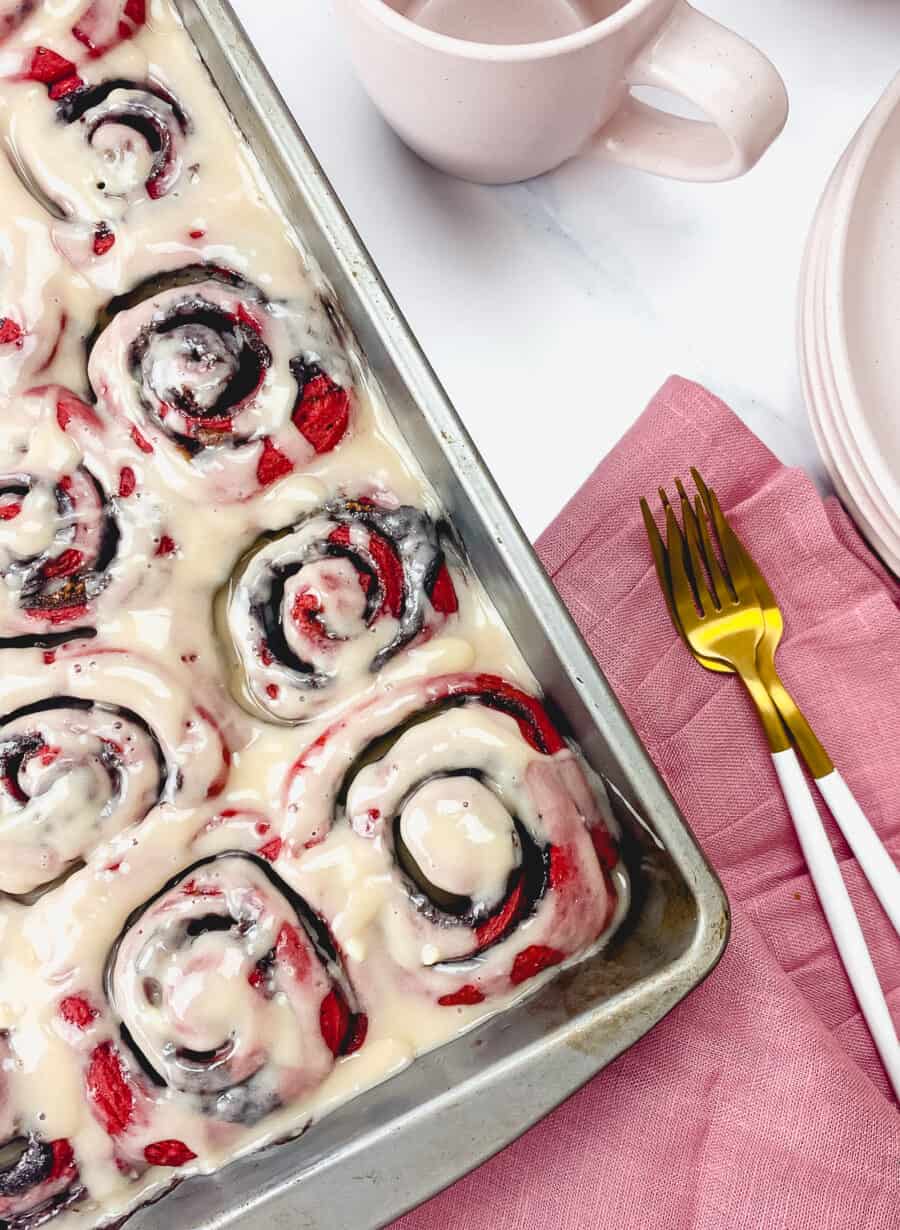
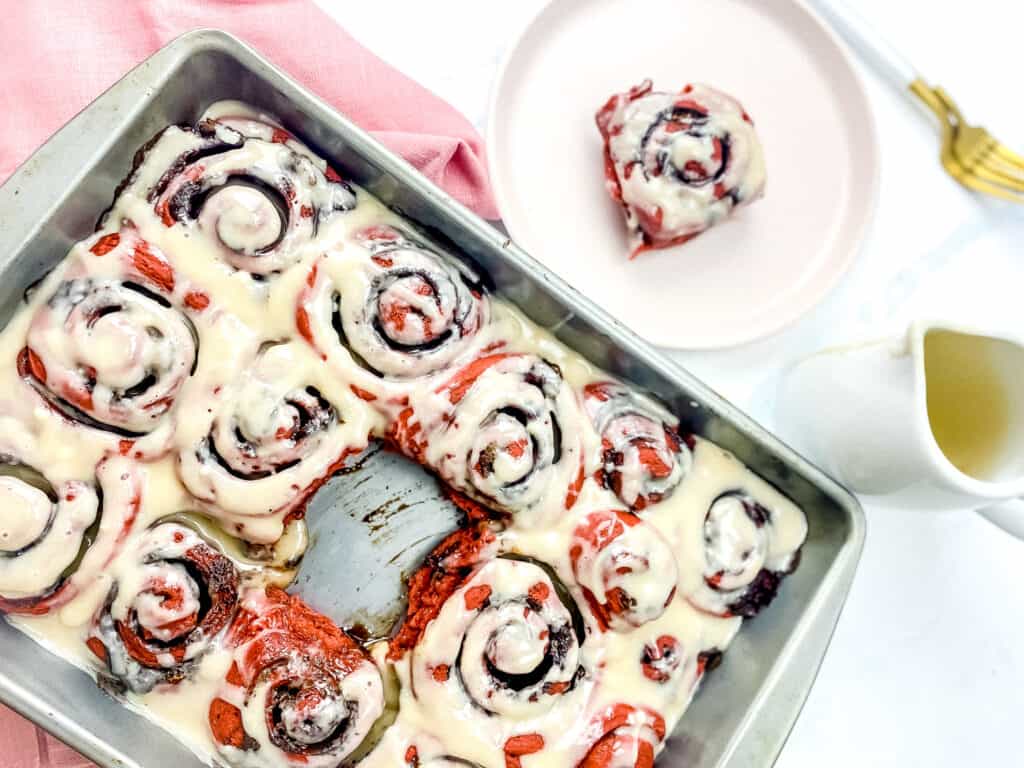
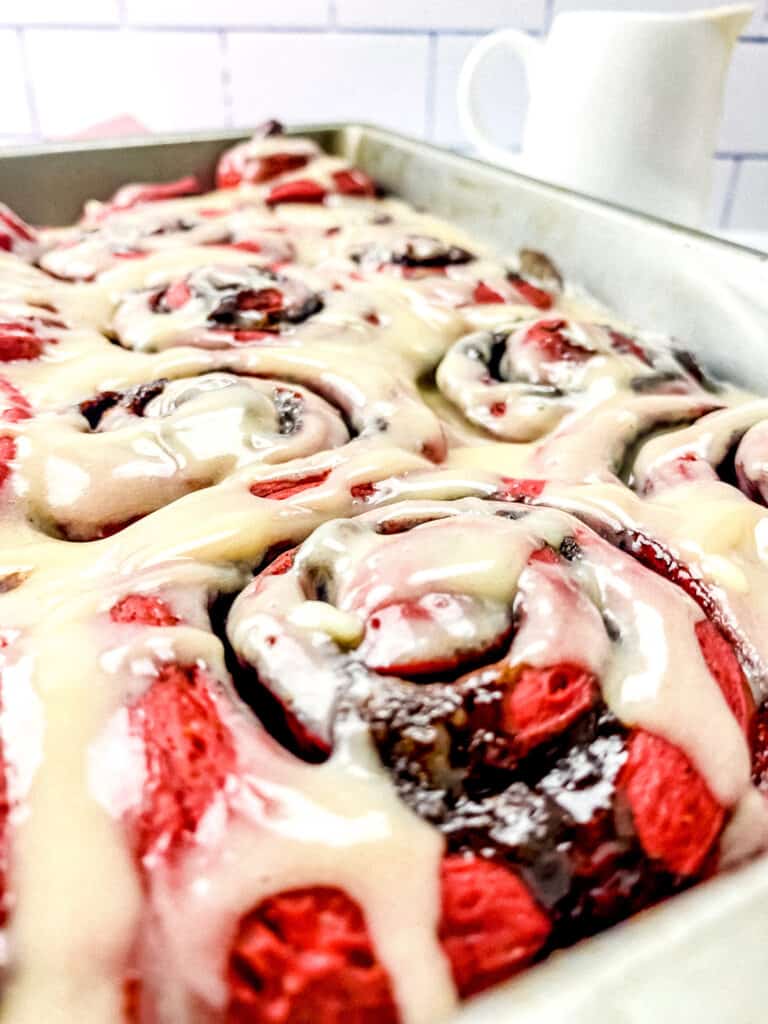
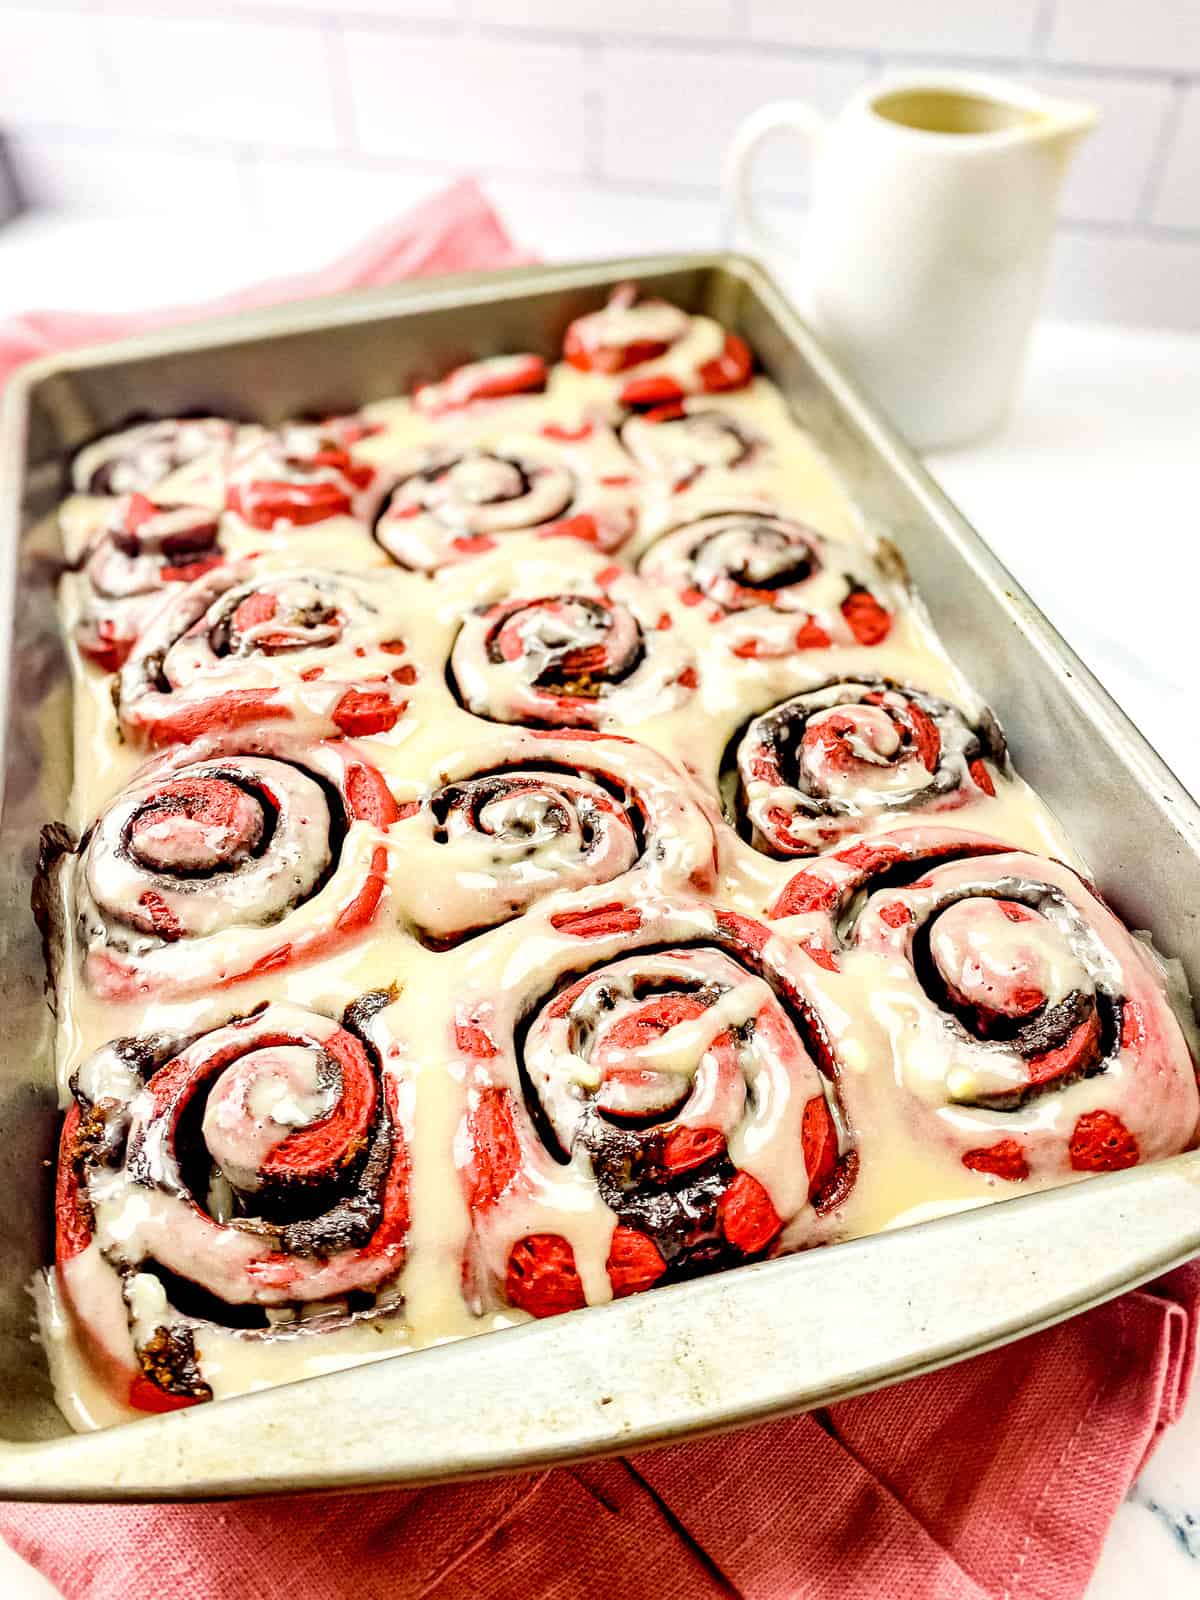
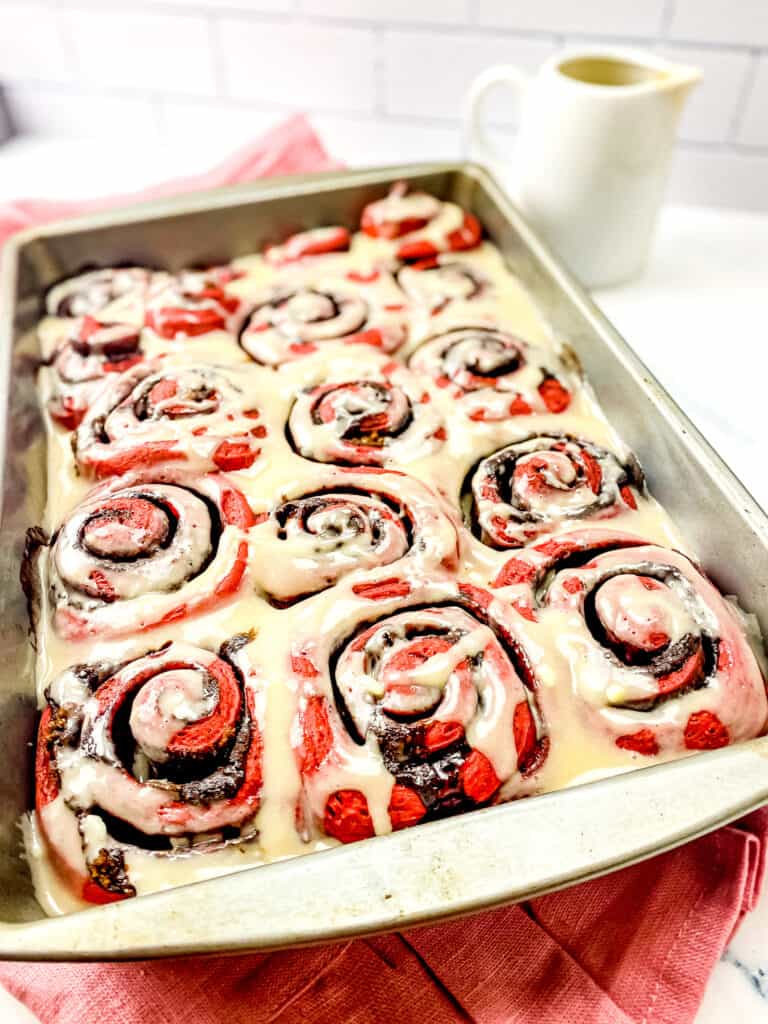
Indulge in the rich and irresistible flavor of these overnight Red Velvet Cinnamon Rolls this Valentine’s Day. With a soft and tender dough, a sweet and gooey cinnamon filling, and a velvety cream cheese glaze, these cinnamon rolls are the ultimate breakfast indulgence. Start your day with a little love and a whole lot of deliciousness.
INTRODUCTION
Celebrate love in all its forms this Valentine’s Day with our sweet and indulgent red velvet cinnamon rolls. Whether you’re spending the day with your boo, your grrrrls, or just yourself, these rolls are the perfect way to add a touch of indulgence to your celebration.
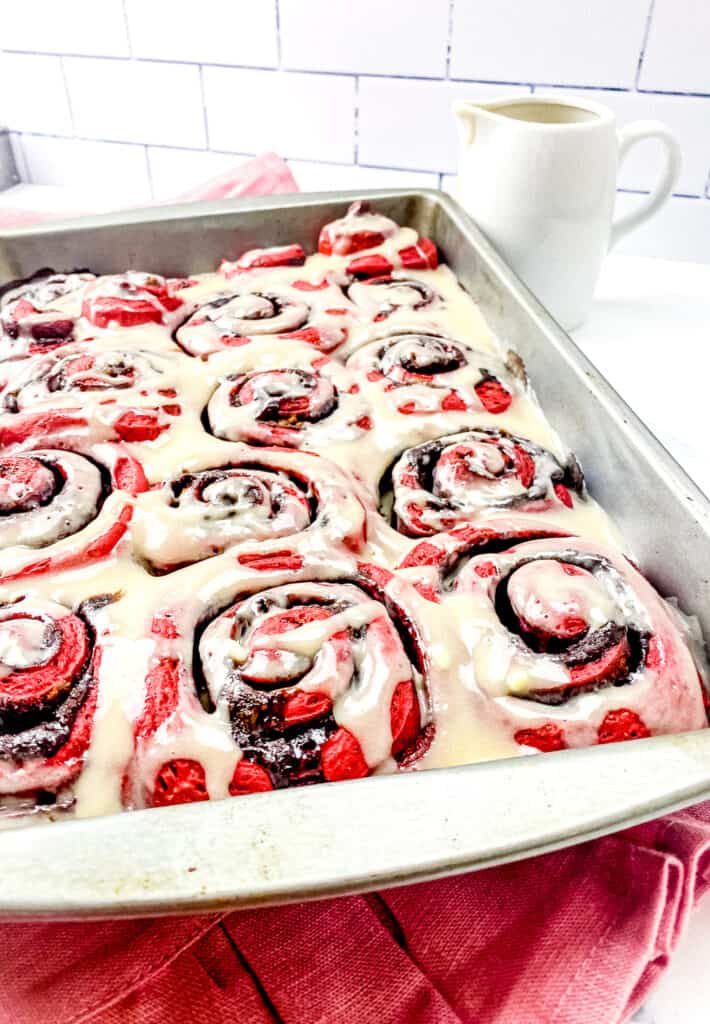
The soft, tender red velvet dough combined with the sweet and gooey cinnamon filling is a match made in heaven. And the creamy cream cheese glaze on top? Simply divine. So, go ahead, treat yourself to a little love and comfort with these delicious red velvet cinnamon rolls.

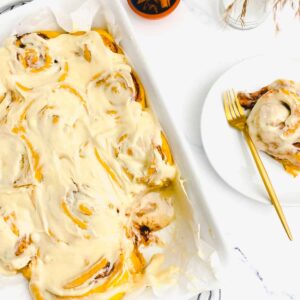
Anddddddddd, If you’re looking for a seasonal twist, try our pumpkin spice cinnamon rolls for a delightful autumnal take on this classic pastry. And for an added touch of richness, don’t forget to try the TikTok viral hack of adding heavy cream before baking.
Whether you’re making these for yourself or to share with loved ones, you’ll be proud of the delectable dessert you’ve created.
The Rise of Red Velvet: How this Decadent Flavor Became a Favorite
Red velvet has become increasingly popular over the years due to a few factors. Firstly, the unique red color and subtle chocolate flavor of red velvet set it apart from other cake flavors and have made it a popular choice for birthdays, weddings, and holidays.
Also, the rise of social media has made it easy to share beautiful photos of red velvet desserts, which has made them even more popular. Also, the rise of food bloggers and food influencers has made it easier to get ingredients and share recipes. This has led to more people making and sharing red velvet recipes. All of these factors have contributed to the growth in the popularity of red velvet over the years.
More Cinnamon Roll Recipes to Satisfy Your Sweet Tooth:
Pumpkin Spice Cinnamon Rolls
Can You Have Your Cake for Breakfast? Are Red Velvet Cinnamon Rolls Breakfast or Dessert?
Cinnamon rolls can be enjoyed as either a breakfast pastry or a dessert. They are usually served warm and can be enjoyed on their own or with a cup of coffee or hot chocolate. Some people like to top their cinnamon rolls with a dollop of cream cheese glaze, which makes them more of a dessert.
What is a Red Velvet Cinnamon Roll?
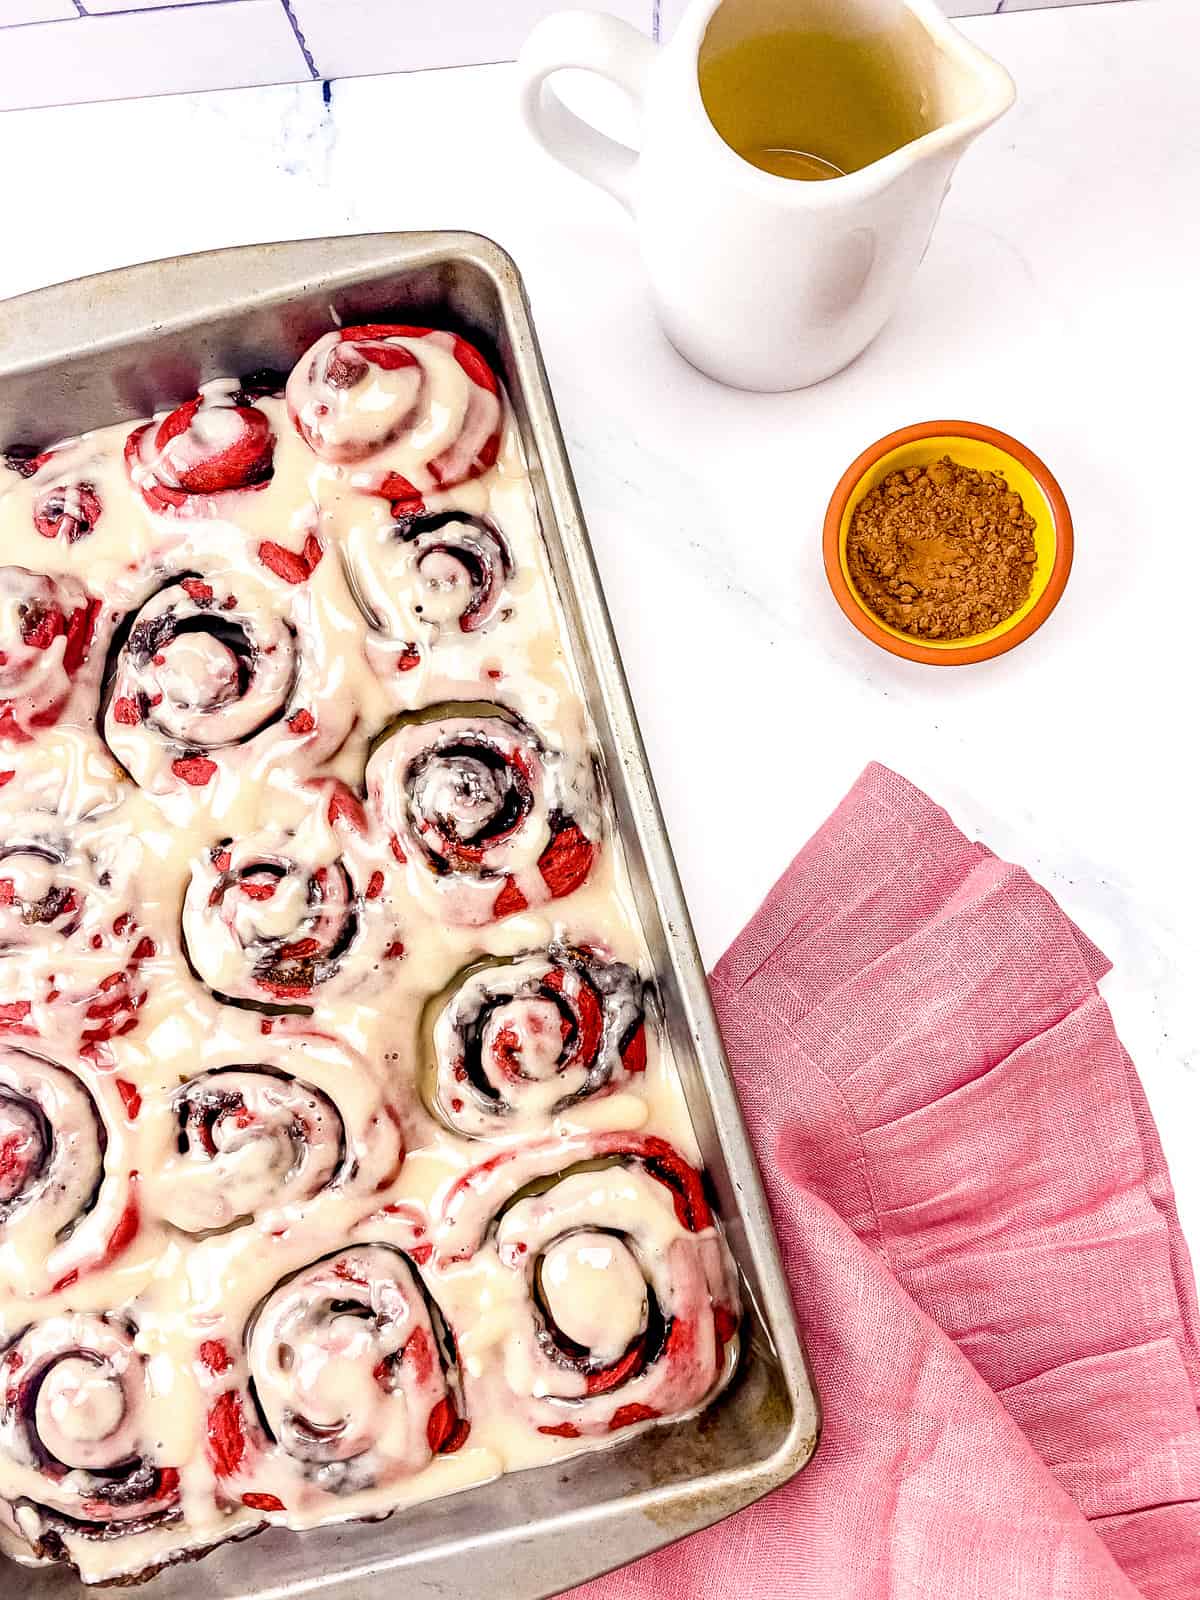
A red velvet cinnamon roll is a pastry that combines the classic flavors of a cinnamon roll with the rich, decadent flavors of red velvet cake. Red food coloring and cocoa powder are used to make the dough for red velvet cinnamon rolls. This gives the dough its deep red color and chocolate flavor.
Like regular cinnamon rolls, the filling for red velvet cinnamon rolls is made with sugar, cinnamon, and butter. The finished product is then topped with a cream cheese glaze, which makes it a rich, indulgent, and very tasty treat.
The Secret Behind Red Velvet’s Distinct Flavor Profile
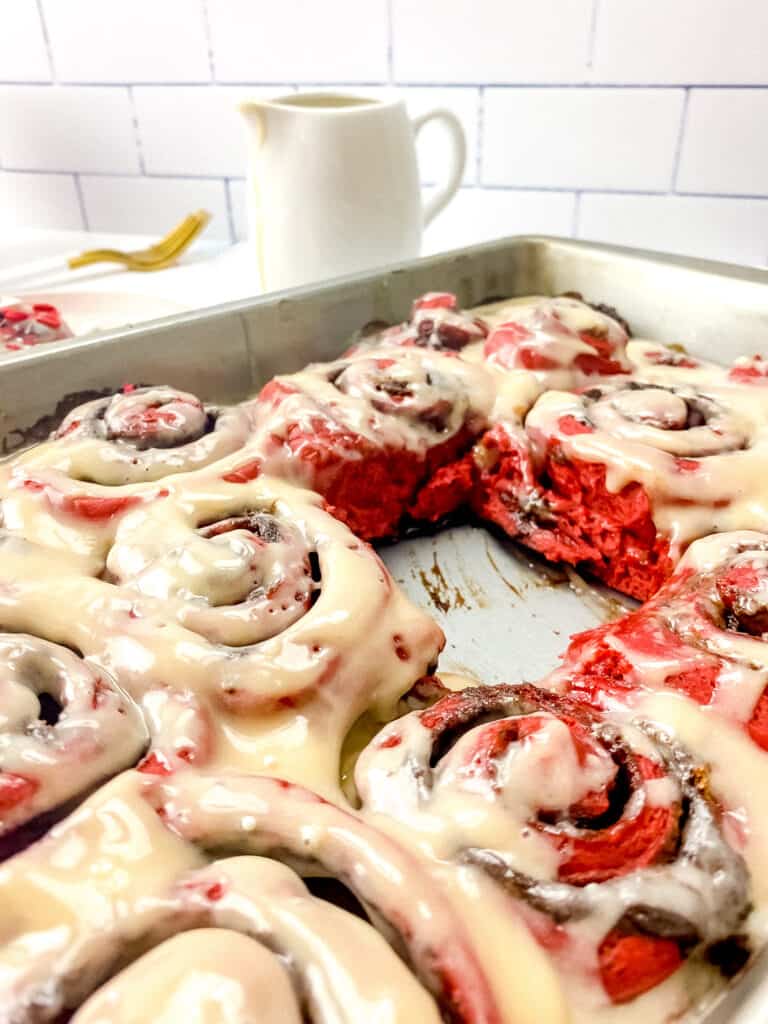
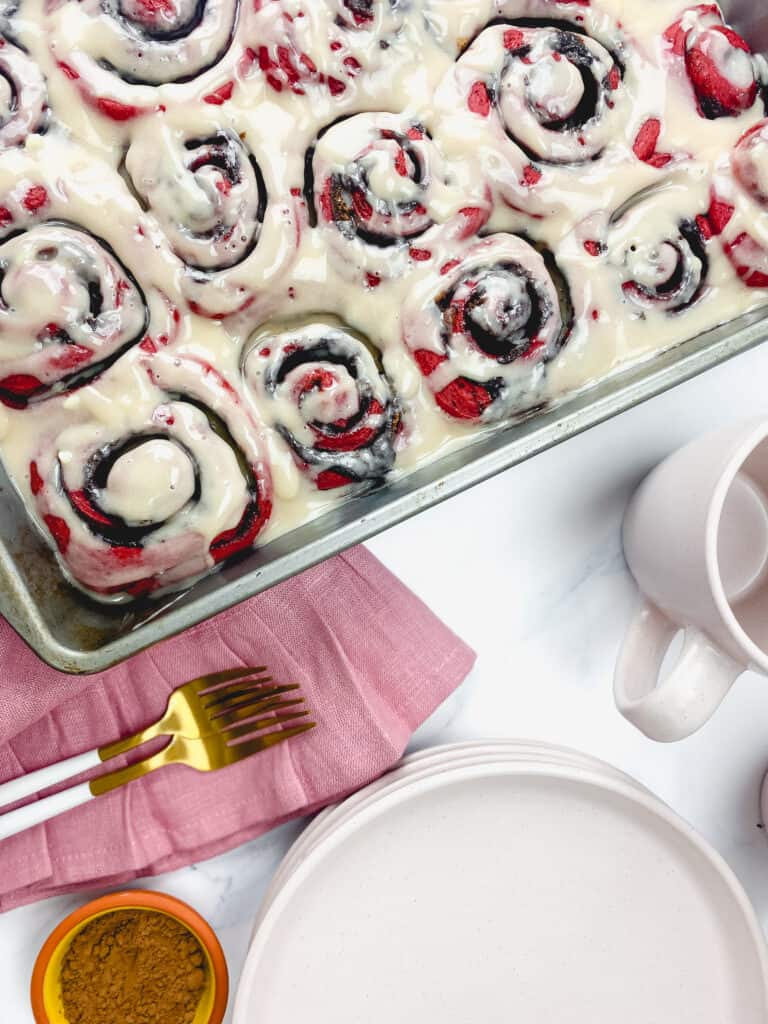
The flavor profile of red velvet cinnamon rolls is sweet, rich, and indulgent. The combination of the red velvet dough and the cinnamon sugar filling creates a good balance of sweet and spicy flavors. The cream cheese glaze takes It over the top with a smooth and tangy flavor that really complements the sweet and spicy flavors of the cinnamon rolls. It’s just chef’s kiss.
How Red Velvet Cake Became a Classic Dessert
The origins of red velvet cake are a mystery, with various theories and legends. Some believe it originated in the late 1800s in the US, while others suggest it dates back to 1700s Europe. One theory is that it was created by Adams Extract Company to sell more red food coloring.
Regardless, red velvet cake became popular in the US in the mid-20th century and remains a classic today. Red velvet cinnamon rolls are the perfect marriage of red velvet cake and cinnamon rolls that sure will be a new favorite of folks who are fans of both pastries.

Secrets to the Softest, Fluffiest Cinnamon Rolls
- Use high-quality cocoa powder – For a rich and intense flavor, use high-quality cocoa powder in the dough and filling.
- Check the yeast’s freshness – Before using your yeast, make sure to check its expiration date and if unsure, proof it to ensure it’s alive and ready to use in your dough.
- Warm the buttermilk to the right temperature – Make sure the buttermilk is warm but not hot, or it can kill the yeast and prevent the dough from rising.
- Use room temperature ingredients – Make sure all ingredients, including eggs, are at room temperature before starting. This ensures that the dough rises evenly and forms a smooth texture.
- Be precise with measurements – When it comes to baking, precise measurements are key. Make sure you measure all ingredients accurately for the best results.
- Flour your work surface and rolling pin: To ensure the dough doesn’t stick to the surface or rolling pin, make sure to flour both thoroughly before rolling out the dough.
- Use a silicone rolling mat: Another option to prevent sticking is to use a silicone rolling mat. This not only makes it easier to roll out the dough but also ensures it doesn’t stick to the surface.
- For a neat and tidy dough – Leave a 1-inch border of plain dough – without the cinnamon mixture along the edges of the dough. This will help prevent the mixture from spilling out during the rolling process.
- Roll with care – When rolling the dough into a log, it is important to keep the roll tight and compact. Some bakers choose to spin the rolling pin gently as they roll to help ensure the dough stays tight and compact. This can help prevent any gaps or holes from forming in the roll, resulting in more evenly baked cinnamon rolls. However, be careful not to apply too much pressure or spin too vigorously, as this could cause the dough to become misshapen or break apart.
- Chill the dough after rolling – After rolling out the dough, chill it in the refrigerator for 15-20 minutes. This makes it easier to cut into rolls and ensures they hold their shape while baking.
- Make sure to fully incorporate the brown sugar into the butter: Before spreading the softened butter on the dough, be sure to thoroughly rub the brown sugar into the butter to ensure even distribution and maximum flavor in every bite.”
- Brush the rolls with melted butter – Before baking, brush the rolls with melted butter. This gives them a rich, golden color and a delicious buttery flavor.
- Bake at the right temperature – Bake the rolls in a preheated oven at 350°F. This ensures that they cook evenly and rise properly.
- Let the rolls cool completely – Before glazing, let the rolls cool completely. This prevents the glaze from melting and ensures it sets properly.
- Make the glaze ahead of time – Make the cream cheese glaze ahead of time and keep it in the refrigerator until ready to use. This makes it easier to drizzle over the rolls and gives them a smooth, creamy texture.

How to Avoid Common Mistakes When Making Cinnamon Rolls
- Overmixing the dough, which can result in a tough and dense texture.
- Not proofing the yeast, which can result in under-risen cinnamon rolls.
- Not using enough filling, which can result in dry and bland cinnamon rolls.
- Rolling the dough too thin, can result in overcooked and dry cinnamon rolls.
- Not covering the pan with plastic wrap, can result in a dry and tough crust on the cinnamon rolls.
- Not refrigerating the cinnamon rolls overnight, can result in a rushed rise and uneven texture.
- Not using a sharp knife or dough cutter, which can result in squished and uneven cinnamon rolls.
INGREDIENT RUNDOWN
Dairy
Choose Your Butter – adds richness and flavor to the dough. Opt for either salted or unsalted, it’s up to you. You’ll need two portions of butter in this recipe – one melted and cooled to room temperature, and the other softened. Adjust the salt content accordingly based on your choice of butter.
Cream Cheese – forms the base of the cream cheese glaze
Whole Milk – thins out the cream cheese glaze
Heavy Cream – will result in a moister, softer texture and a richer flavor, but it can also make the rolls more delicate and prone to falling apart. It’s recommended to start with a small amount and gradually increase to your desired level. (this ingredient is optional)
Baking
All-Purpose Flour – forms the structure of the dough
Cocoa Powder – adds a chocolate flavor to the dough
Active Dry Yeast – helps the dough rise
Salt – balances the flavors in the dough
Brown Sugar (light or dark)- adds sweetness and caramel flavor to the filling
Cinnamon – adds spice to the filling
Powdered Sugar (same as confectioners sugar) – adds sweetness and thickness to the cream cheese glaze
Eggs
Eggs – provide structure and moisture to the dough
Egg Yolks – provide richness to the dough
Sweeteners
Sugar – adds sweetness to the dough and filling
Flavorings
Vanilla Extract – enhances the flavor of the dough. Use a good quality vanilla extract for best results.
Red Food Coloring – For the signature red hue in your red velvet treats, I used gel food coloring, but classic food coloring works just as well.
Liquid
Buttermilk – For that tangy and tender twist, I added cultured buttermilk powder to my recipe. You can opt for either powder or liquid buttermilk. Buttermilk helps activate the yeast and makes the cinnamon rolls soft and fluffy. It’s crucial to warm the buttermilk to the right temperature, between 100°–110°F for Active Dry Yeast or 120°–130°F for Instant yeast. If the yeast is not at the correct temperature, the cinnamon rolls will be dense and tough. Don’t skip this step for the best results.
Grab the Grocery List!

INGREDIENTS TO MAKE THIS OVERNIGHT RED VELVET CINNAMON ROLLS
Here’s what you’ll need:
For the Dough
- 2 large eggs
- 2 large egg yolks
- 1⁄3 cup granulated sugar
- 6 tablespoons unsalted butter, melted and cooled to room temperature
- 2 teaspoons red food coloring
- 1 teaspoon pure vanilla extract
- 3 3⁄4 cups all-purpose flour, divided
- 2 tablespoons unsweetened cocoa powder
- 1 package active dry yeast (1/4 ounce, or 2 1/4 teaspoons)
- 1 teaspoon salt
- 1/4 – 1/2 cups heavy cream – The exact amount of heavy cream needed will depend on the size of your rolls but aim for a generous pour that fully covers the rolls (this step is optional)
For the Filling
- 1⁄2 cup packed brown sugar (light or dark)
- 1⁄4 cup granulated sugar
- 2 tablespoons cocoa powder
- 1 teaspoon ground cinnamon
- 1⁄8 teaspoon salt
- 2 tablespoons unsalted butter
For the Cream Cheese Glaze
- 1⁄4 cup cream cheese softened
- 2 tablespoons butter (unsalted + melted)
- 4 tablespoons whole milk (room temperature)
- 1 tablespoon pure vanilla extract
- 2 cups powdered sugar (confectioners sugar)
PREPARATION
How to Make Overnight Red Velvet Cinnamon Rolls
Mixing By Hand
- Lightly spray a large bowl with cooking spray or lightly coat it with neutral oil and set aside. This will help prevent the dough from sticking.
- In a separate bowl, stir together the eggs, egg yolks, sugar, butter, food coloring, vanilla extract, 2 cups of flour, cocoa powder, yeast, and salt with a wooden spoon or whisk. Mix until the dough forms a wet, sticky mass.
- Turn the dough onto a floured surface and knead for 8-10 minutes. The dough should be soft, moist, and tacky, but not excessively sticky. If the dough is too wet, add more flour 1 tablespoon at a time, until the desired texture is achieved.
- Scrape the kneaded dough into the lightly oiled bowl, and turn once to coat.
- Cover the top of the bowl with plastic wrap or a dry dish towel, while it rises or proofs. Make sure the towel is large enough to cover the entire bowl, and that it doesn’t touch the dough. This will help to keep the dough warm and prevent it from drying out.
- Place the bowl in a warm, draft-free location, and let the dough rise for 1 hour or until doubled in size. To test the dough, gently press with your finger. If the indentation remains, the dough has fully risen.
Mixing with a Stand Mixer
- Stir the ingredients together by hand or using the mixer’s paddle attachment until they are evenly moistened.
- Attach the dough hook and add the remaining 1 and 3/4 cups of flour.
- Knead the dough on low speed for 6 minutes. The dough should be soft, moist, and tacky, but not excessively sticky. If the dough is too wet, add more flour 1 tablespoon at a time, until the desired texture is achieved.
- Transfer the dough to the greased mixing bowl, turning it once to coat.
- Cover the top of the bowl with plastic wrap or a dry dish towel, while it rises or proofs. Make sure the towel is large enough to cover the entire bowl, and that it doesn’t touch the dough. This will help to keep the dough warm and prevent it from drying out.
- Place the bowl in a warm, draft-free location, and let the dough rise for 2-2 1/2 hours or until doubled in size. To test the dough, gently press with your finger. If the indentation remains, the dough has fully risen.
Preparing the Filling
- While the dough is rising, make the filling by mixing together the brown sugar, granulated sugar, cocoa powder, cinnamon, and salt in a small bowl.
- Melt butter and set aside.
Shaping the Cinnamon Rolls
- Butter a 9×13-inch ceramic or glass baking dish.
- Roll the risen dough into an 18-inch by 12-inch rectangle on a lightly floured surface, with the longest side closest to you.
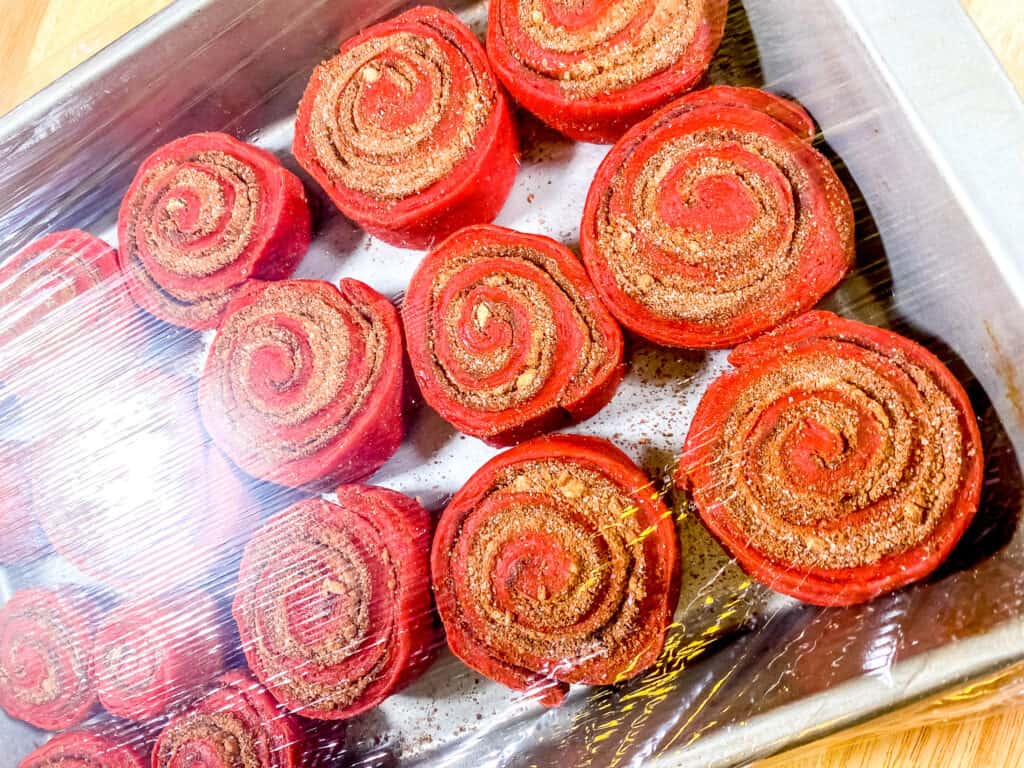
- Brush the dough with melted butter, then sprinkle the brown sugar-cocoa powder mixture over it. Leave a 1-inch border of plain dough without the cinnamon mixture along the edges of the dough. This will help prevent the mixture from spilling out during the rolling process.
- Starting with the long edge, tightly roll the dough into an 18-inch log.
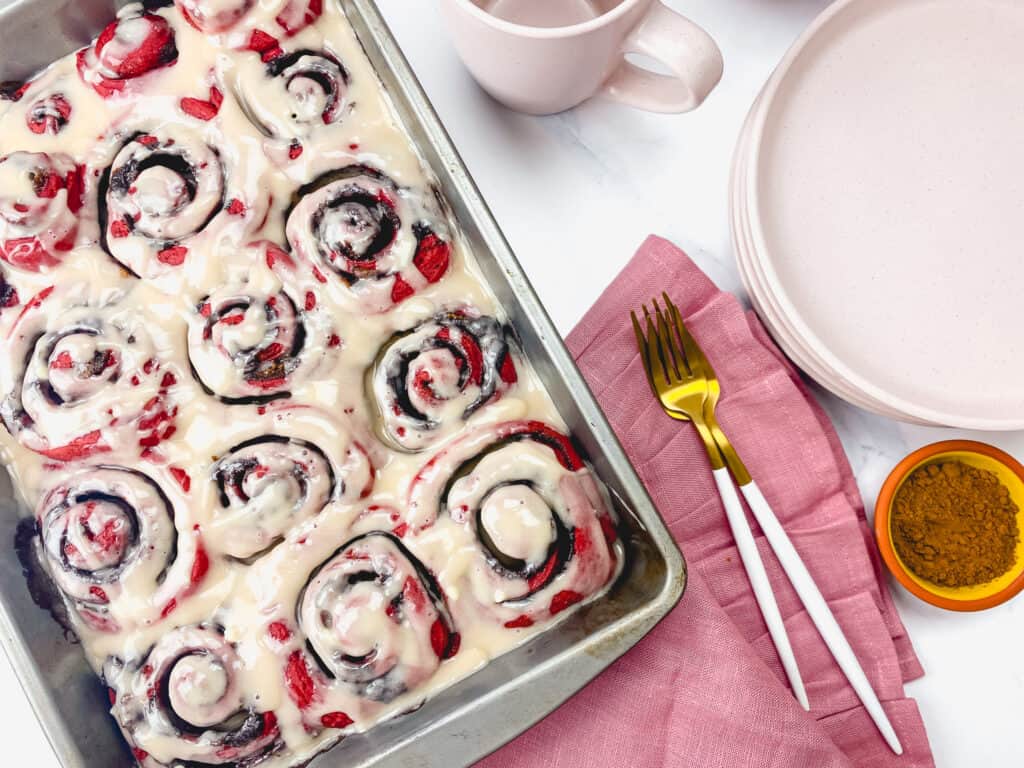
- To cut the rolls, you can use a serrated knife or unwaxed floss. If using a knife, gently saw the log into 12, 1 1/2-inch wide pieces. If using floss, slide the floss under the roll and crisscross the ends, pulling through to cut the roll in half. Repeat to cut the rolls into 12 pieces.
- Place the rolls into the prepared baking dish, cover them with plastic wrap, and refrigerate overnight.
Baking the Cinnamon Rolls
- The next day, remove the rolls from the refrigerator and let them come to room temperature.
- Preheat the oven to 350 degrees F. Place a rack in the center of the oven.
- For extra decadence, you can add a pour of heavy cream over the cinnamon rolls right before baking. Simply drizzle 1/4 cup of heavy cream over the top of the rolls, making sure to cover them evenly. The heavy cream will add richness and moisture to the rolls, resulting in an even more indulgent treat. If you choose to add the heavy cream, bake the rolls as directed in the recipe. (this step is optional)
- Bake the rolls until they are puffed and slightly darkened and the internal temperature reaches 190 degrees F, about 30 minutes. If the rolls are browning too quickly, simply place a piece of foil over the top of the pan to protect them.
- Remove the pan from the oven and place on a wire rack to cool slightly.
Making the Glaze
- In a mixing bowl, beat cream cheese until smooth.
- Add milk, and vanilla extract, and whisk until combined.
- Slowly mix in the sifted powdered sugar until smooth.
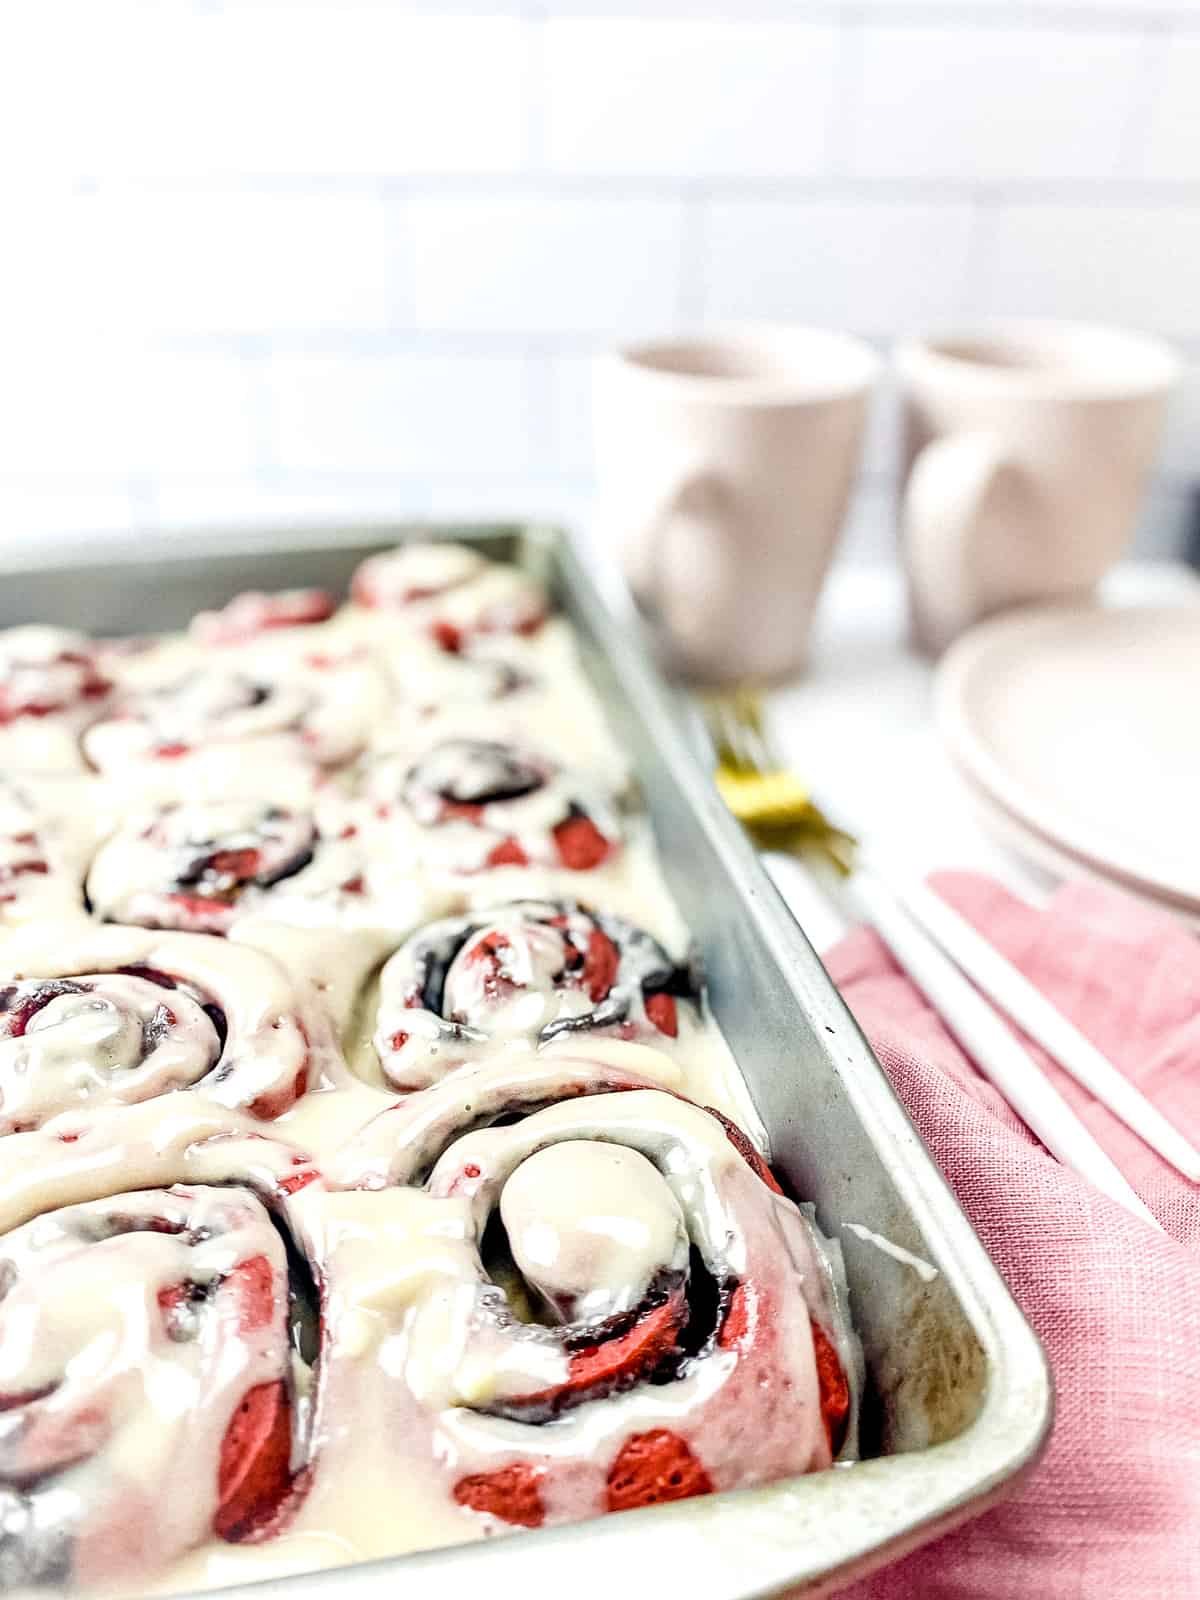
- Drizzle the glaze over warm rolls and serve immediately.
Need the full, printable recipe? No problem! Just check out the recipe card below for all the ingredients, measurements, and instructions you’ll need. And if you prefer to have a visual guide, we’ve got you covered with a recipe video that will walk you through the process step by step.
Red Velvet Cinnamon Roll Recipe Video
The Caloric Breakdown for these Red Velvet Cinnamon Rolls
| Nutrient | Amount per serving | % Daily Value |
|---|---|---|
| Calories | 350 | 17.5% |
| Total Fat | 15g | 23% |
| Saturated Fat | 9g | 45% |
| Cholesterol | 95mg | 32% |
| Sodium | 330mg | 14% |
| Total Carbohydrates | 49g | 16% |
| Dietary Fiber | 2g | 8% |
| Sugars | 28g | 56% |
| Protein | 5g | 10% |

RECIPE FAQs
Red velvet cinnamon rolls are made with a red velvet flavored dough, while regular cinnamon rolls are made with a traditional sweet dough. The red velvet flavor is achieved by adding red food coloring and cocoa powder to the dough.
Absolutely! This blog post will guide you every step of the way in making the most mouth-watering and indulgent red velvet cinnamon rolls right in your own kitchen. With just a few simple ingredients and a little bit of elbow grease, you can create a delectable breakfast treat that will have everyone raving. The steps include creating the perfect dough, rolling it out to the perfect thickness, adding the irresistible filling, and finally baking the rolls to golden perfection. Get ready to impress yourself and your loved ones! I gotchu.
The key ingredients for a red velvet cinnamon roll are all-purpose flour, eggs, sugar, melted butter, red food coloring, unsweetened cocoa powder, active dry yeast, salt, buttermilk (or buttermilk powder), brown sugar, cinnamon, and a cream cheese glaze made with cream cheese, butter, milk, vanilla extract, and powdered sugar.
Making red velvet cinnamon rolls from scratch can take several hours, including the time it takes for the dough to rise. However, the actual hands-on time is relatively short, and the results are well worth the wait.
Red velvet cinnamon rolls are a treat that is high in sugar and calories, and they do not offer significant health benefits. However, they can be enjoyed in moderation as part of a balanced diet
What is the Ideal Time Frame for My Dough to Rise and Proof Before Making these cinnamon rolls?
The appropriate time for the dough to rise and proof depends on several factors, including the temperature of the room and the ingredients used. Typically, the dough should rise for 1 to 2 hours, or until it has doubled in size, before being punched down to release excess air.
The dough should then be left to proof for a second time, usually for an additional 30 minutes to 1 hour, or until it has risen and become light and airy. It is important to keep an eye on the dough during the proofing process to ensure that it doesn’t overproof, which can lead to a dense and heavy final product.
What are some Draft-Free Locations to Proof My Dough for the Best Rise?
- In a turned-off oven with the light on. Place the covered dough in an oven that has been turned off, but is still warm from preheating. This will create a warm, humid environment that is perfect for rising dough.
- The bread-proofing setting on new ovens is a great option for a draft-free location to let your dough rise. This setting provides the ideal temperature and humidity level for the dough to rise, resulting in perfectly risen dough every time. The bread-proofing setting can be found on many new ovens and is a convenient and reliable option for proofing your dough.
- In a microwave oven with a bowl of warm water. Place the covered dough in the microwave and heat a cup of water in the microwave for 2 minutes. The steam from the hot water will create a warm, humid environment that is perfect for rising dough.
- In a covered pot on top of a heated surface such as a warming tray or slow cooker.
- A Warm Place: Place the covered dough in a warm, draft-free location such as near a radiator or in a sunny window. This will allow the dough to rise slowly and evenly.
How Do I Ensure My Dough Stays Tight and Compact When Rolling the Cinnamon Rolls?
When rolling the dough into a log, it is important to keep the roll tight and compact. Some bakers choose to spin the rolling pin gently as they roll to help ensure the dough stays tight and compact.
This can help prevent any gaps or holes from forming in the roll, resulting in more evenly baked cinnamon rolls. However, be careful not to apply too much pressure or spin too vigorously, as this could cause the dough to become misshapen or break apart.

What are Some Alternative Methods for Cutting the Cinnamon Rolls Besides Using a Knife?
Unwaxed floss is a great alternative method for cutting the roll. To use it, simply slide the floss under the roll, cross the ends over the top, and pull in opposite directions to make a clean and precise cut without squishing the rolls.
How Can I Make These Red Velvet Cinnamon Rolls Vegan?
Here are some easy modifications to transform this overnight red velvet cinnamon roll recipe into a vegan delight:
- For the dough: Use flax eggs instead of regular eggs and egg yolks. You can also use vegan butter in place of unsalted butter.
- For the filling: Use vegan butter instead of dairy butter.
- For the cream cheese glaze: Use vegan cream cheese and vegan butter in place of regular cream cheese and butter.
- For the buttermilk: Use a plant-based milk of your choice and add a tablespoon of apple cider vinegar or lemon juice to it. Let it sit for 10 minutes until it curdles, then use it in place of buttermilk.
Is it Breakfast or Dessert? The Cinnamon Roll Conundrum
Cinnamon rolls are the epitome of indulgence, with their rich and sweet flavors that make them a popular treat. But they can also be enjoyed as a delicious breakfast option, especially when served warm and fresh from the oven, paired with a hot cup of coffee or milk.
Their versatility and popularity have made them a staple in many households, enjoyed any time of day. Whether you prefer to savor them as a decadent dessert or a warm and comforting breakfast, the choice is yours. At the end of the day, the classification of cinnamon rolls as either breakfast or dessert is a matter of personal preference.
SUBSTITUITON & ADDITIONS
If you don’t have buttermilk on hand, you can easily make a substitute by mixing equal parts of milk and either lemon juice or vinegar. Simply combine 1 cup of milk with 1 tablespoon of lemon juice or vinegar, stir, and let it sit for a few minutes until it thickens and curdles. This will give you the same tangy flavor and acidity that buttermilk provides, allowing you to make your red velvet cinnamon rolls just as delicious as ever.
Instant yeast can be used as a substitute for active dry yeast.
Yes, you can use salted butter instead of unsalted butter, but you may need to adjust the salt in the recipe accordingly.
Yes, you can use a different food coloring instead of red food coloring in the recipe. However, keep in mind that using a different color will change the appearance and flavor of your red velvet cinnamon rolls. If you prefer a different hue, consider using a food coloring that is specifically labeled as ‘natural’ or ‘plant-based’ to maintain the vegan-friendliness of the recipe. Some popular alternatives to red food coloring include beet juice, pomegranate juice, or hibiscus powder. You can experiment with different coloring options to find the one that works best for you, or you can simply leave out the food coloring altogether and enjoy the natural color of the red velvet dough.
What are the Benefits of Using Buttermilk Culture Powder Compared to Liquid Buttermilk in Recipes?
Buttermilk culture powder and liquid buttermilk can both be used as a substitute in recipes, each offering its own unique benefits. The powder variety will give you the same tangy flavor, creamy texture, and delicious taste in your baked goods as liquid buttermilk. Some bakers prefer using the powder form because it eliminates the problem of wasting leftover buttermilk, as most recipes only call for a small amount. Additionally, switching to the powder form can save you money in the long run. In the end, the choice between buttermilk culture powder and liquid buttermilk is up to you, as both will work equally well in your recipes.
What is the Difference between Active Dry Yeast and Instant Yeast in Terms of Usage in Baking?
Active dry yeast and instant yeast are two common types of yeast used in baking, but they differ in their properties and usage. Active dry yeast needs to be activated in warm liquid before use and typically takes longer to rise, while instant yeast can be added directly to the dry ingredients and results in a faster rise. It’s important to choose the right yeast for your recipe, as using the wrong type can affect the outcome of your baked goods.
According to King Arther Flour, dissolving active dry yeast in warm water before use is not necessary, despite what the yeast packet may indicate. Learn more by reading the full post on their website.

Can I Use Bread Flour to Make Cinnamon Rolls?
Yes, you can use bread flour to make overnight cinnamon rolls. Bread flour is a high-protein flour that is often used in yeast-based baked goods due to its ability to produce a strong, chewy dough. When making cinnamon rolls, the dough should be soft and tender, yet sturdy enough to hold its shape. Bread flour can help achieve this desired texture by providing structure and stability to the dough. However, it’s important to note that using bread flour may result in a denser finished product compared to using all-purpose flour. Additionally, you may need to adjust the amount of flour used in the recipe, as bread flour is typically more absorbent than all-purpose flour.
What are the Different Ways to Melt the Butter for the Recipe?
There are several methods for melting butter, including:
- Microwave Method: Place the butter in a microwave-safe dish and heat it in the microwave for 30-second intervals, stirring in between, until the butter is melted.
- Stovetop Method: Place the butter in a small saucepan over low heat and stir constantly until melted.
- Double Boiler Method: Fill the bottom of a double boiler with water and place the butter in the top part of the double boiler. Place the double boiler over medium heat and stir the butter until melted.
Regardless of the method you choose, make sure to melt the butter slowly and stir it frequently to prevent it from burning.
VARIATIONS & TWISTS
There are many variations that can be made to the classic red velvet cinnamon roll recipe. Some popular variations include:
Add Nuts: Adding chopped nuts such as pecans, walnuts, or almonds to the filling can give the cinnamon rolls an extra crunch and nutty flavor.
Chocolate Chips: Sprinkling some mini chocolate chips into the filling can add a sweet and chocolatey twist to the cinnamon rolls.
Cream Cheese Filling: Adding a layer of cream cheese filling between the dough and the cinnamon filling can make the cinnamon rolls even more rich and creamy.
Different Frosting: Instead of the cream cheese glaze, try using a different type of frosting such as a chocolate or vanilla frosting to change up the flavor.
Spiced Filling: Adding spices such as nutmeg, cardamom, or pumpkin spice to the filling can give the cinnamon rolls a different flavor profile.
Swirl Design: Instead of rolling the dough into a cylinder, try swirling the cinnamon filling into the dough for a different design.
Add Fruit: Adding dried fruit such as cranberries, raisins, or cherries to the filling can add a touch of sweetness and fruitiness to the cinnamon rolls. These are just a few ideas to get started, and the possibilities are endless when it comes to variations on the classic red velvet cinnamon roll recipe!
In addition to these variations, you can also make the recipe vegan by using vegan butter and a dairy-free cream cheese substitute in place of the traditional ingredients.
Another popular variation that has recently gone viral on TikTok is to add heavy cream to the dough before baking for an even richer and creamier flavor.
Lastly, why not try our pumpkin spice cinnamon rolls? A seasonal twist on the classic cinnamon rolls. The possibilities for variations are endless, so don’t be afraid to get creative and try new things!
FOOD PAIRINGS
The Art of Pairing: Picking the Perfect Pairing for Your Cinnamon Rolls
Cinnamon rolls, are sweet and indulgent and can be paired with contrasting flavors to create a harmonious and satisfying meal. A steaming cup of coffee or tea, a freshly squeezed glass of orange juice, or a cold glass of milk are all great options to consider.
These complementary flavors help to balance out the sweetness of the cinnamon rolls, making for a well-rounded and enjoyable experience. So, whether you have cinnamon rolls for breakfast, brunch, or a sweet snack, don’t be afraid to mix and match flavors to find your perfect combination.

GOT LEFTOVERS?
How to Store Leftover Cinnamon Rolls in the Fridge?
- Allow the cinnamon rolls to cool completely: Before storing the cinnamon rolls, let them cool to room temperature. This will prevent any moisture from forming inside the container and affecting the texture of the rolls.
- Wrap the cinnamon rolls in plastic wrap or aluminum foil: Use plastic wrap or aluminum foil to wrap each cinnamon roll individually. This will help to maintain the rolls’ moisture and keep them from drying out.
- Place the wrapped rolls in an airtight container: Transfer the wrapped cinnamon rolls to an airtight container or resealable plastic bag. Be sure to label the container with the date so you know how long they have been stored.
- Store the container in the refrigerator: Place the container of cinnamon rolls in the refrigerator, making sure to keep them away from raw or perishable food items.
- Reheat the rolls before serving: When you’re ready to enjoy your leftover cinnamon rolls, simply remove them from the fridge, unwrap them, and place them in a preheated oven or microwave until they are warm and gooey.
Leftover cinnamon rolls can be stored in the refrigerator for up to 3-4 days, after which the risk of food spoilage and potential food poisoning increases. To extend the shelf life of your leftover cinnamon rolls, it’s recommended to freeze them as soon as possible if you don’t plan on consuming them within 4 days.
How to Store Leftover Cinnamon Rolls in the Freezer?
Here are the steps to store leftover cinnamon rolls in the freezer:
- Wrap the cinnamon rolls in plastic wrap or aluminum foil: Wrap each individual cinnamon roll in plastic wrap or aluminum foil. This will help to protect the rolls from freezer burn and keep them fresh.
- Place the wrapped rolls in a resealable freezer bag: Transfer the wrapped cinnamon rolls to a resealable freezer bag and label it with the date.
- Remove as much air as possible: Before sealing the freezer bag, press down on the bag to remove as much air as possible. This will help to prevent freezer burn and extend the shelf life of the cinnamon rolls.
- Store the freezer bag in the freezer: Place the freezer bag of cinnamon rolls in the freezer, making sure to store them in a flat, stackable position for easy organization.
- Thaw the rolls before reheating: When you’re ready to enjoy your frozen cinnamon rolls, simply remove the desired number of rolls from the freezer and place them in the fridge to thaw overnight. The next morning, place the rolls in a preheated oven or microwave until they are warm and gooey.
By following these steps, you can store leftover cinnamon rolls in the freezer for up to 3 months. Just remember to always label your freezer bag with the date so you can keep track of how long they have been stored.
Properly wrapped and stored, it will maintain the best quality for about 1 month.
NEED TO REHEAT?
How To Reheat Cinnamon Rolls In The Microwave?
- Place the leftover cinnamon rolls on a microwave-safe plate.
- Microwave for 15-20 seconds or until the rolls are warmed through and the glaze has melted.
- Serve and enjoy!
How To Reheat Cinnamon Rolls In The Oven?
- Preheat the oven to 350°F (175°C).
- Line a baking sheet with parchment paper or aluminum foil.
- Place the leftover cinnamon rolls on the prepared baking sheet.
- Bake for 8-10 minutes or until the rolls are warmed through and the glaze has melted.
- Serve and enjoy!

How To Reheat Cinnamon Rolls In The Air Fryer?
- Turn on the air fryer and set it to 350°F (175°C).
- Place the leftover cinnamon rolls in the air fryer basket.
- Fry for 5-7 minutes or until the rolls are warmed through and the glaze has melted.
- Serve and enjoy!

How To Reheat Cinnamon Rolls On The Stovetop?
- Place a skillet over medium heat.
- Place the leftover cinnamon rolls in the skillet.
- Cook for 2-3 minutes on each side or until the rolls are warmed through and the glaze has melted.
- Serve and enjoy!
Which Reheating Method is Best?
The best reheating method for red velvet cinnamon rolls depends on your personal preference.
To achieve a crispy exterior the oven or air fryer is your best bet. If a soft and fluffy texture is desired, the microwave or stovetop is the recommended option.
- Reheat the cinnamon rolls just before serving to ensure that they stay fresh and delicious.
- Do not overheat the cinnamon rolls as this can cause them to become dry and tough.
- Store leftover cinnamon rolls in an airtight container in the refrigerator for up to 3 days.
Final Thought
There you have it, folks! A delicious and easy recipe for overnight red velvet cinnamon rolls. I hope you give this recipe a try and let me know how it turns out in the comments. If you have any questions or concerns, feel free to ask. And as always, don’t forget to tag me on social media with your recreation of this or any of our recipes using @kerriannskravings. Happy baking and Happy Valentine’s Day! xx
Kraving More?
Our irresistible cinnamon roll recipes and tantalizing dessert kollections will satisfy your sweet tooth. Find your new favorite right now! Check out our recipe index and indulge in endless possibilities to satisfy your kravings.

The Ultimate Overnight Red Velvet Cinnamon Rolls
Soft and tender red velvet cinnamon rolls with a sweet cinnamon filling and creamy cream cheese glaze. Perfect for breakfast or dessert!
1
cinnamon roll30
minutes30
minutes350
kcal2
hours30
minutes720
minutes15
hours30
minutes*keeps your device screen on
Gather Your Ingredients
- For the Red Velvet Dough
2 large eggs
2 large egg yolks
1/3 cup granulated sugar
6 tablespoons unsalted butter, melted and cooled to room temperature
2 teaspoons red food coloring
1 teaspoon pure vanilla extract
3 3/4 cups all-purpose flour, divided
2 tablespoons unsweetened cocoa powder
1 package active dry yeast (1/4 ounce, or 2 1/4 teaspoons)
1 teaspoon salt
3/4 cup buttermilk (warm) ( I used the buttermilk powder)
1/4 – 1/2 cup heavy cream (optional)
- For the Filling
1/2 cup packed brown sugar (light or dark)
1/4 cup granulated sugar
2 tablespoons cocoa powder
1 teaspoon ground cinnamon
1/8 teaspoon salt
2 tablespoons unsalted butter
- For the Cream Cheese Glaze
1/4 cup cream cheese softened
2 tablespoons butter (unsalted + melted)
4 tablespoons whole milk (room temperature)
1 tablespoon pure vanilla extract
2 cups powdered sugar (confectioners sugar)
Instructions
- Mixing By Hand
- Prepare a large bowl by lightly spraying it with cooking spray or coating it with a neutral oil.
- In a separate bowl, combine eggs, egg yolks, sugar, butter, food coloring, vanilla extract, 2 cups of flour, cocoa powder, yeast, and salt using a wooden spoon or whisk. Stir until a wet and sticky dough forms.
- Turn the dough onto a floured surface and knead for 8-10 minutes. Use as little flour as possible to avoid making the dough tough.
- Place the kneaded dough in the prepared bowl, turn to coat, cover with plastic wrap, and let it rise for 1 hour or until doubled in size.
- Mixing with a Stand Mixer
- Stir the ingredients together by hand or using the mixer’s paddle attachment until they are evenly moistened.
- Attach the dough hook and add the remaining 1 and 3/4 cups of flour.
- Knead the dough on low speed for 6 minutes. The dough should be soft, moist, and tacky, but not excessively sticky. If the dough is too wet, add more flour 1 tablespoon at a time, until the desired texture is achieved.
- Transfer the dough to the greased mixing bowl, turning it once to coat.
- Cover the top of the bowl with plastic wrap or a dry dish towel, while it rises or proofs. Make sure the towel is large enough to cover the entire bowl, and that it doesn’t touch the dough. This will help to keep the dough warm and prevent it from drying out.
- Place the bowl in a warm, draft-free location, and let the dough rise for 2-2 1/2 hour or until doubled in size. To test the dough, gently press with your finger. If the indentation remains, the dough has fully risen.
- Preparing the Filling
- While the dough is rising, make the filling by mixing together the brown sugar, granulated sugar, cocoa powder, cinnamon, and salt in a small bowl.
- Melt butter and set aside.
- Shaping the Cinnamon Rolls
- Butter a 9×13-inch ceramic or glass baking dish.
- Roll the risen dough into an 18-inch by 12-inch rectangle on a lightly floured surface, with the longest side closest to you.
- Brush the dough with melted butter, then sprinkle the brown sugar-cocoa powder mixture over it. Leave a 1-inch border of plain dough without the cinnamon mixture along the edges of the dough. This will help prevent the mixture from spilling out during the rolling process.
- Starting with the long edge, tightly roll the dough into an 18-inch log.
- To cut the rolls, you can use a serrated knife or unwaxed floss. If using a knife, gently saw the log into 12, 1 1/2-inch wide pieces. If using floss, slide the floss under the roll and crisscross the ends, pulling through to cut the roll in half. Repeat to cut the rolls into 12 pieces.
- Place the rolls into the prepared baking dish, cover them with plastic wrap, and refrigerate overnight.
- Baking the Cinnamon Rolls
- The next day, remove the rolls from the refrigerator and let them come to room temperature.
- Preheat the oven to 350 degrees F. Place a rack in the center of the oven.
- Bake the rolls until they are puffed and slightly darkened and the internal temperature reaches 190 degrees F, about 30 minutes. If the rolls are browning too quickly, simply place a piece of foil over the top of the pan to protect them.
- Remove the pan from the oven and place it on a wire rack to cool slightly.
- Making the Glaze
- Making The Glaze
- In a mixing bowl, beat cream cheese until smooth.
- Add milk, and vanilla extract, and whisk until combined.
- Slowly mix in the sifted powdered sugar until smooth.
- Drizzle the glaze over warm rolls and serve immediately.
Recipe Video
Kerri’s Recipe Tips
- For extra decadence, try incorporating the TikTok cinnamon rolls hack by pouring a generous amount of heavy cream over the top of the rolls before baking. The exact amount of heavy cream needed will depend on the size of your rolls but aim for a generous pour that fully covers the rolls. If you choose to add the heavy cream, bake the rolls as directed in the recipe. ***It’s important to note that adding heavy cream to the rolls before baking will result in a moister, softer texture, and richer flavor, but it can also make the rolls more delicate and prone to falling apart. It’s recommended to start with a small amount and gradually increase to your desired level.
- Use high-quality cocoa powder – For a rich and intense flavor, use high-quality cocoa powder in the dough and filling.
- Check the yeast’s freshness – Before using your yeast, make sure to check its expiration date and if unsure, proof it to ensure it’s alive and ready to use in your dough.
- Warm the buttermilk to the right temperature – Make sure the buttermilk is warm but not hot, or it can kill the yeast and prevent the dough from rising.
- Use room temperature ingredients – Make sure all ingredients, including eggs, are at room temperature before starting. This ensures that the dough rises evenly and forms a smooth texture.
- Be precise with measurements – When it comes to baking, precise measurements are key. Make sure you measure all ingredients accurately for the best results.
- Flour your work surface and rolling pin: To ensure the dough doesn’t stick to the surface or rolling pin, make sure to flour both thoroughly before rolling out the dough.
- Use a silicone rolling mat: Another option to prevent sticking is to use a silicone rolling mat. This not only makes it easier to roll out the dough but also ensures it doesn’t stick to the surface.
- For a neat and tidy dough – Leave a 1-inch border of plain dough – without the cinnamon mixture along the edges of the dough. This will help prevent the mixture from spilling out during the rolling process.
- Roll with care – When rolling the dough into a log, it is important to keep the roll tight and compact. Some bakers choose to spin the rolling pin gently as they roll to help ensure the dough stays tight and compact. This can help prevent any gaps or holes from forming in the roll, resulting in more evenly baked cinnamon rolls. However, be careful not to apply too much pressure or spin too vigorously, as this could cause the dough to become misshapen or break apart.
- Chill the dough after rolling – After rolling out the dough, chill it in the refrigerator for 15-20 minutes. This makes it easier to cut into rolls and ensures they hold their shape while baking.
- Make sure to fully incorporate the brown sugar into the butter: Before spreading the softened butter on the dough, be sure to thoroughly rub the brown sugar into the butter to ensure even distribution and maximum flavor in every bite.”
- Brush the rolls with melted butter – Before baking, brush the rolls with melted butter. This gives them a rich, golden color and a delicious buttery flavor.
- Bake at the right temperature – Bake the rolls in a preheated oven at 350°F. This ensures that they cook evenly and rise properly.
- Let the rolls cool completely – Before glazing, let the rolls cool completely. This prevents the glaze from melting and ensures it sets properly.
- Make the glaze ahead of time – Make the cream cheese glaze ahead of time and keep it in the refrigerator until ready to use. This makes it easier to drizzle over the rolls and gives them a smooth, creamy texture.
- It is important to calibrate your oven regularly to ensure that your recipes turn out correctly. Ovens can drift from their set temperatures over time, so it is a good idea to check the calibration every few months.
- I highly recommend reading through the recipe in full a couple of times before starting to ensure that you know exactly what to expect and can prep accordingly. This can help to prevent any mistakes or surprises during the cooking process and will help you to achieve the best possible results. It’s also a good idea to gather all of your ingredients and equipment beforehand to make the process as smooth and efficient as possible.
- Proper preparation, or “mise en place,” is key to successful cooking. Gather all ingredients and have them measured and ready before cooking to avoid forgetting important items and focus on the cooking process. This technique can save time, prevent frustration, and improve the outcome of your recipe. Remember to use mise en place to prepare all ingredients before cooking.
- To make grocery shopping and recipe-saving easier, you can generate a shopping list of all the ingredients and save the recipe with a single click. (scroll ↓)

Key Equipment/Products Use

Non-stick baking pan (9×13 inch)
Buy Now → Buy Now →
  Buy Now →
  Buy Now →
  Buy Now →
  Buy Now →
  Buy Now →
  Buy Now →
  Buy Now →
 Nutrition Label
12 servings per container
Serving Size1 1 cinnamon roll
Calories350
- Amount Per Serving% Daily Value *
- Total Fat
15g
24%
- Saturated Fat 9g 45%
- Cholesterol 95mg 32%
- Sodium 330mg 14%
- Amount Per Serving% Daily Value *
- Total Carbohydrate
49g
17%
- Dietary Fiber 2g 8%
- Sugars 28g
- Protein 5g 10%
* The % Daily Value tells you how much a nutrient in a serving of food contributes to a daily diet. 2,000 calories a day is used for general nutrition advice.
Nutritional Disclaimer
kerriannskravings.com occasionally offers nutritional information for recipes contained on this site. This information is provided as a courtesy and is an estimate only. To obtain the most accurate representation of the nutritional information in any given recipe, you should calculate the nutritional information with the actual ingredients used in your recipe. For more information read our Nutritional Disclaimer.


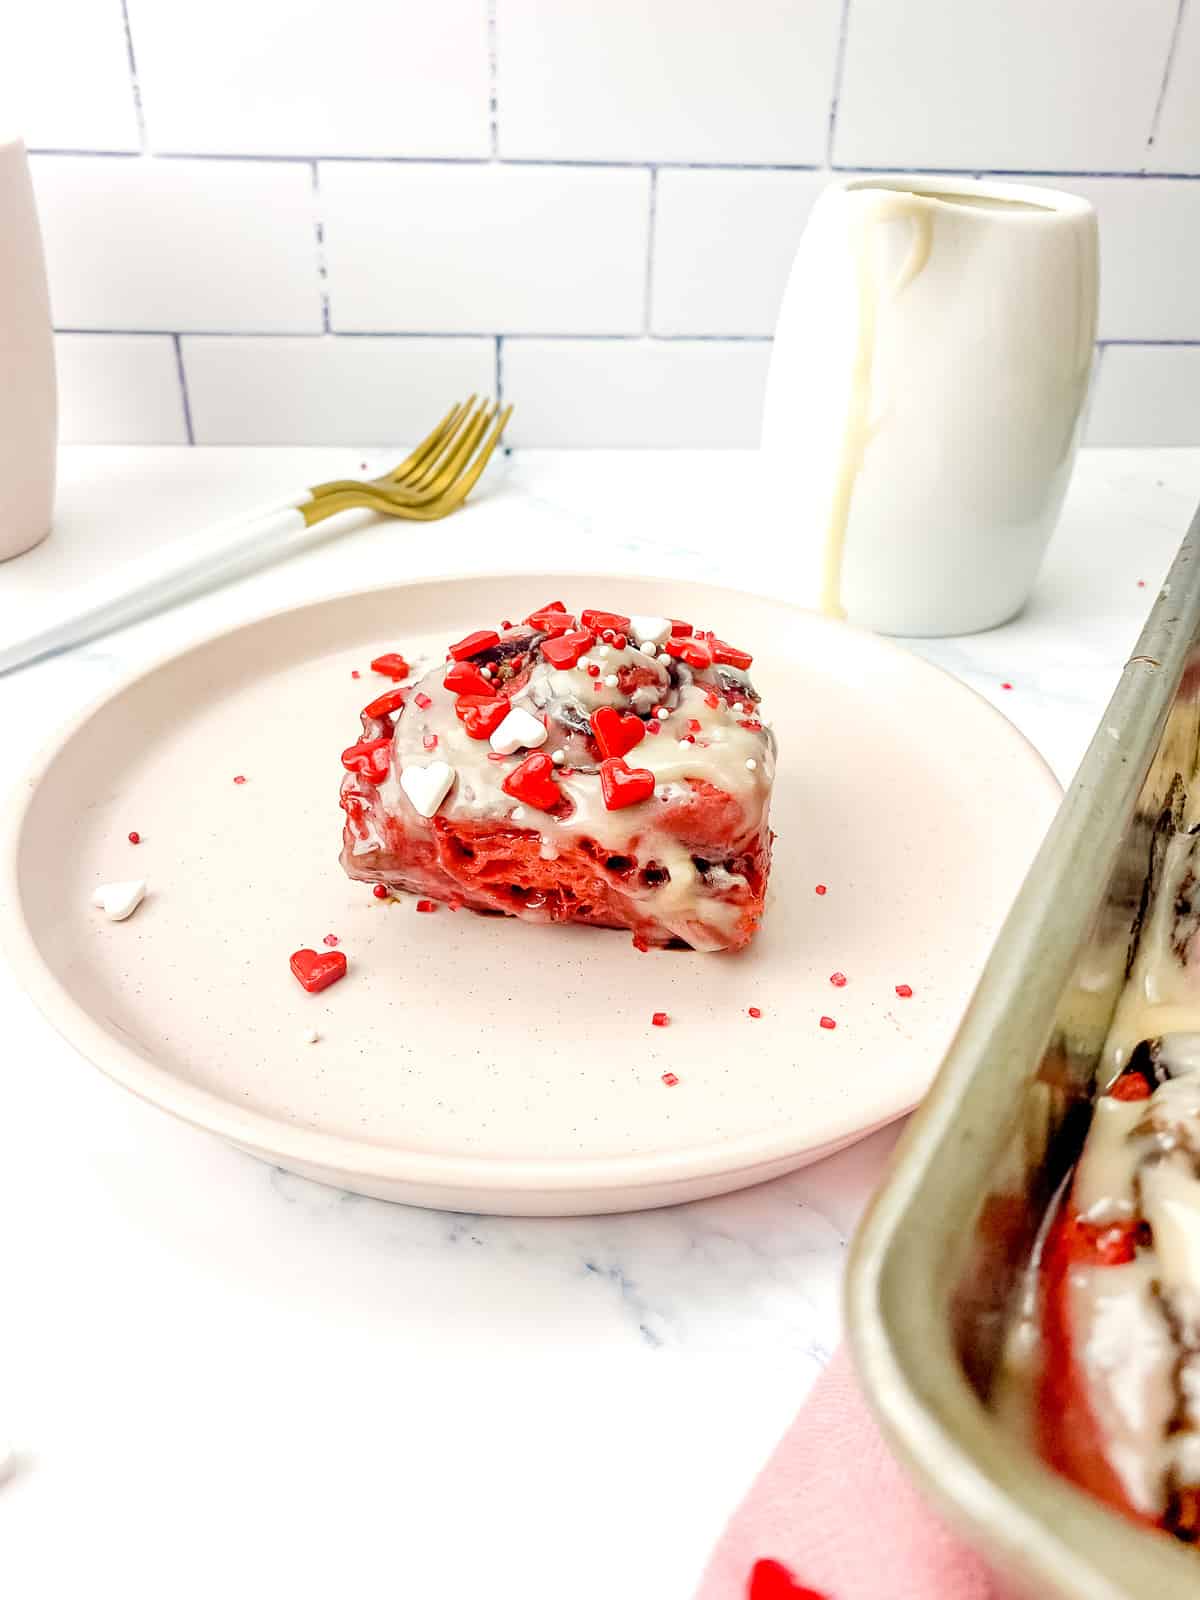
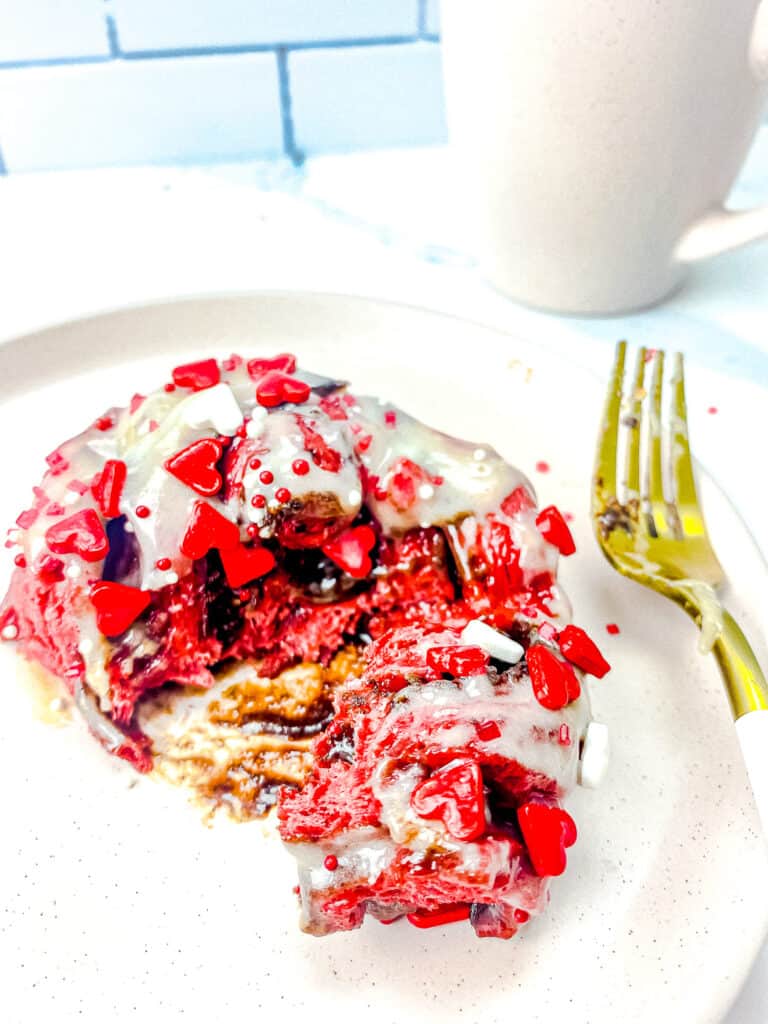
These cinnamon rolls were such a treat for brunch over the weekend. I added sprinkles to make it extra fancy!
These rolls were epic. Sweet, fluffy, and so decadent. I was hooked at the first bite! The chocolatey filling with the cream cheese glaze and the gooey cinnamon rolls is just too good to even put into words! Thank you for this incredible recipe!
These came out so perfect! I appreciated all your tips to help make them as good as possible. We can’t stop eating them!
There are DANGEROUSLY good. My sister loves red velvet so I made these for a little girls brunch get together and we devoured them. Can’t wait to make them again for Christmas morning!
We had an at home date night on the weekend, and let me tell you…it took everything for my husband and I not to finish off the entire pan then drink the glaze haha! Such a great recipe, came out perfect!
These rolls were given tens across the board from my family and friends! They were simply perfect for a casual Sunday brunch.
Kerri-Ann, these rolls look so delicious!
Is it terrible that I doubled this recipe to make one pan for myself and another pan for the rest of my family members to share LOL! These red velvet cinnamon rolls are amazing! Definitely worth the overnight wait. My favorite part? The cream cheese glaze… drooling! Gonna make these for Christmas for sure!
Red velvet is my son’s favorite cake flavor, so I made these to celebrate his acing a really difficult exam. He ate three! I don’t know if that’s healthy, but it sure does speak to how good they are, LOL!
My daughter saw this recipe and started begging immediately! I’m so glad I found this recipe and I cannot wait to try it this weekend!